Login with Muzodo
Let your members log into your website using their Muzodo password.
- Have a members only area on your website?
- Want to manage your members accounts in one place?
- Not want your members to have to remember multiple passwords?
Below are the steps you need to run through to get it working. Note that we'll be using WordPress as the example website management system. If you're hosted on Wix, see Wix SSO login.
There are a few of steps to go through but they're easy and you should have a working system in no time.
The basics
You've no doubt used the 'Proceed with Google', 'Login with Facebook' or some other authentication service to log into a website. It is often referred to as SSO, or 'Single Sign On'.
Muzodo provides the same service to your members.
Here's how it works
When someone attempts to access a member-only page on your website, they are asked to 'Login with Muzodo'. They are redirected to a Muzodo login page where they type in their email address and Muzodo password. If they put in their correct details, Muzodo lets your website know that they're a bonafide member of your group and redirects them back to the page on your website.Now that they're logged in, they can see the member-only pages.
For convenience (recommended), if the verified user does not exist on your website, you can get your website to auto-create the user - this saves you time setting up users and having to create a new WP user each time you get a new member.
It is secure?
Yes, Muzodo uses a widely-used secure protocol called OpenID Connect to enable access to your members area. Learn more..This is the same that is used by Google, Facebook, Okta, etc. All communications between your website and Muzodo occur over an SSL (Secure Socket Layer) connection, which uses encryption to keep things private.
There are 2 main components:
- The Client ID (which is public) and
- The Client Secret (which, as you may have guessed, is private).
There are 5 main steps
- Install the WordPress plugins on your website
- Get your Client ID and Secret from Muzodo
- Fill in the Client ID, Secret and other information (detailed below) on your website
- Configure your member page settings
- Set a page to members-only on your website
Let's get started!
1a. Install the WordPress OpenID Connect Generic plugin on your website
This is a required plugin and is used to enable communication between Muzodo and your website. To install it, log into your WP Admin area, open the Plugins tab and click the 'New Plugin' button. Search for OpenID Connect, install and activate.
1b. Install a WordPress member pages plugin on your website
WordPress allows you to create users but does not come standard with member-only pages, so you'll need to install a plugin. You are free to use any member page plugin and if you're already using one, great - skip this step!The plugin we'll use in this example is called ARMember as the lite version is free to use to create a restricted area, where access does not require payment. To install it, log into your WP Admin area, open the Plugins tab and click the 'New Plugin' button. Search for ARMember, install and activate.
Note: ARMember adds its logo to your admin login page. While not requested, it's just cosmetic. If this is not acceptable for your group, you'll need to use another membership plugin.
Note also that ARMember installs some pages that we don't need, so we'll delete those (see below).
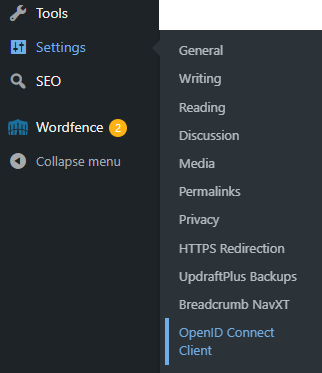
Next open the settings page, so you can fill in the connection details.
2. Get your Client ID and Client Secret from Muzodo
Now that you have the settings page open, open a new browser tab/window and log into Muzodo (you must be an admin) and get the info you need to connect to Muzodo. You'll find it by opening the Groups tab, clicking on your group name and then clicking 'Advanced..' on the website line. Here is a screenshot of our example group: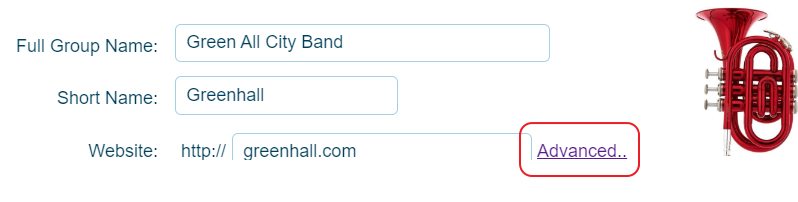
In the pop-up that appears, click on 'Enabled' and Muzodo will suggest some values. Unless you have a reason to change them, you can just use these suggested values. The Client ID is a human readable name of the website Muzodo is being used to log into. The Client Secret is a statistically unguessable value. If you want Info-only members or Extras to be able to see your member-only website areas, select as appropriate.

3. Fill in the Client ID, Secret and other information on your website
Copy the values from Muzodo into your WordPress settings page.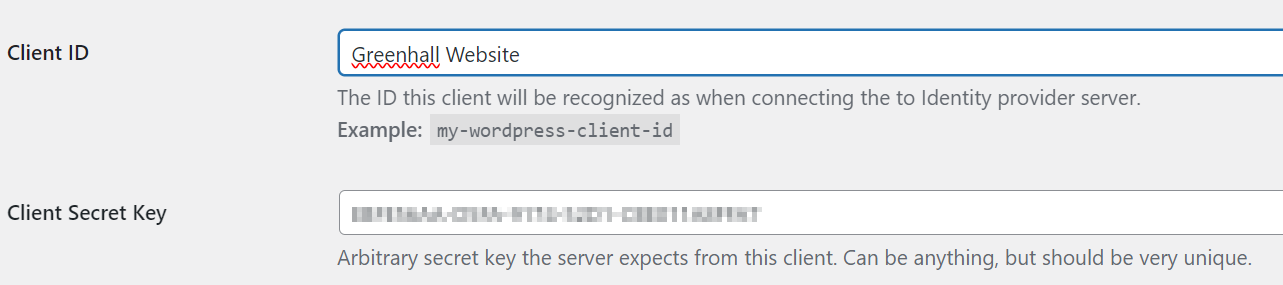
Return to Muzodo and save these settings: click 'Ok' and then 'Update' button at the bottom of your group settings.
Come back to your WordPress site and fill in the rest of the details as follows, ensuring to accurately copy each one.
- OpenID Scope: email profile openid
- Login Endpoint URL: https://muzodo.com/oauth2/authorize
- Userinfo Endpoint URL: https://muzodo.com/oauth2/userinfo
- Token Validation Endpoint URL: https://muzodo.com/oauth2/token
- End Session Endpoint URL: https://muzodo.com/oauth2/logout
- ACR values: (leave blank)
- Identity Key: sub
- Disable SSL Verify: (leave unticked)
- HTTP Request Timeout: 10
- Nickname Key: first_name
- Email Formatting: {email}
- Display Name Formatting: {first_name} {last_name}
Whew!! Double-check everything is copied correctly and click 'Save Changes' at the bottom of the page.
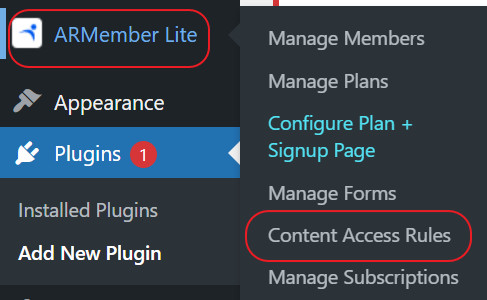
4. Configure your member page settings
Skip this if you already have a member pages system.Next up is to decide how you want your member pages to work. In your WordPress menu, select 'ARMember Lite' and then 'Content Access Rules'.
You can decide how you want to mark pages for viewing by members only. If you're familiar with WordPress, 'Categories' is a good choice. We're going to go with the simpler 'Pages' option.
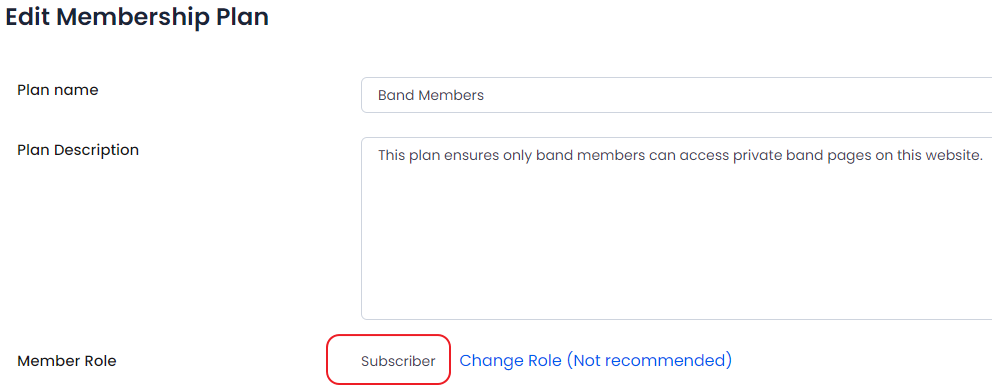
Next, set the permissions so that the free membership plan is assigned by default to your members. Note this is specific to the ARMember plugin, if you're using a different membership plugin, it'll work differently.
By default when users are created, WP assigns them the 'Subscriber' role. To link this to the free membership plan, click 'ARMember Lite', 'Manage Plans' and edit the 'Free members' plan to use the subscriber role. Feel free to update the description as we did below:
5. Set a page to members-only on your website
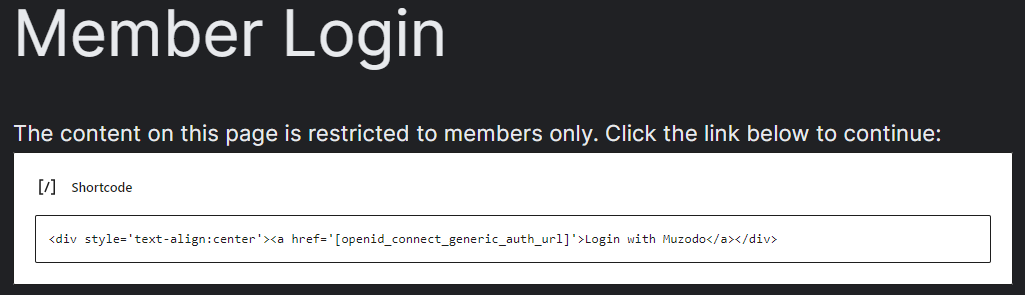
The first part of this is to create a login redirect page. WordPress will show this page when a person who is not logged in attempts to access a member-only page. You can style it how you want to but at its core, it can be a very simple page with 2 blocks. The first block is the heading, with the value 'Member login'. The 2nd block is a ShortCode or HTML block with the value:
<a href='[openid_connect_generic_auth_url]'>Login with Muzodo</a>.
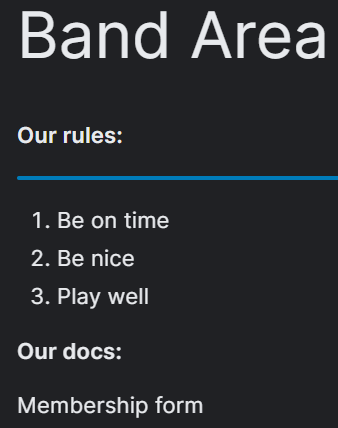
Now we create a protected (private) page with member-only information. In the WP menu on the left, click 'Pages', 'Add New Page' and add your band content.
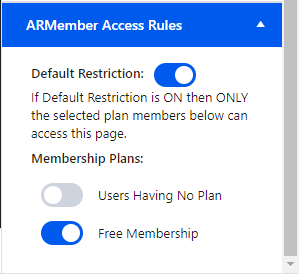
Before publishing, scroll down on the right and set the access rule to 'Free Membership'. You'll need to do this for every member-only page.
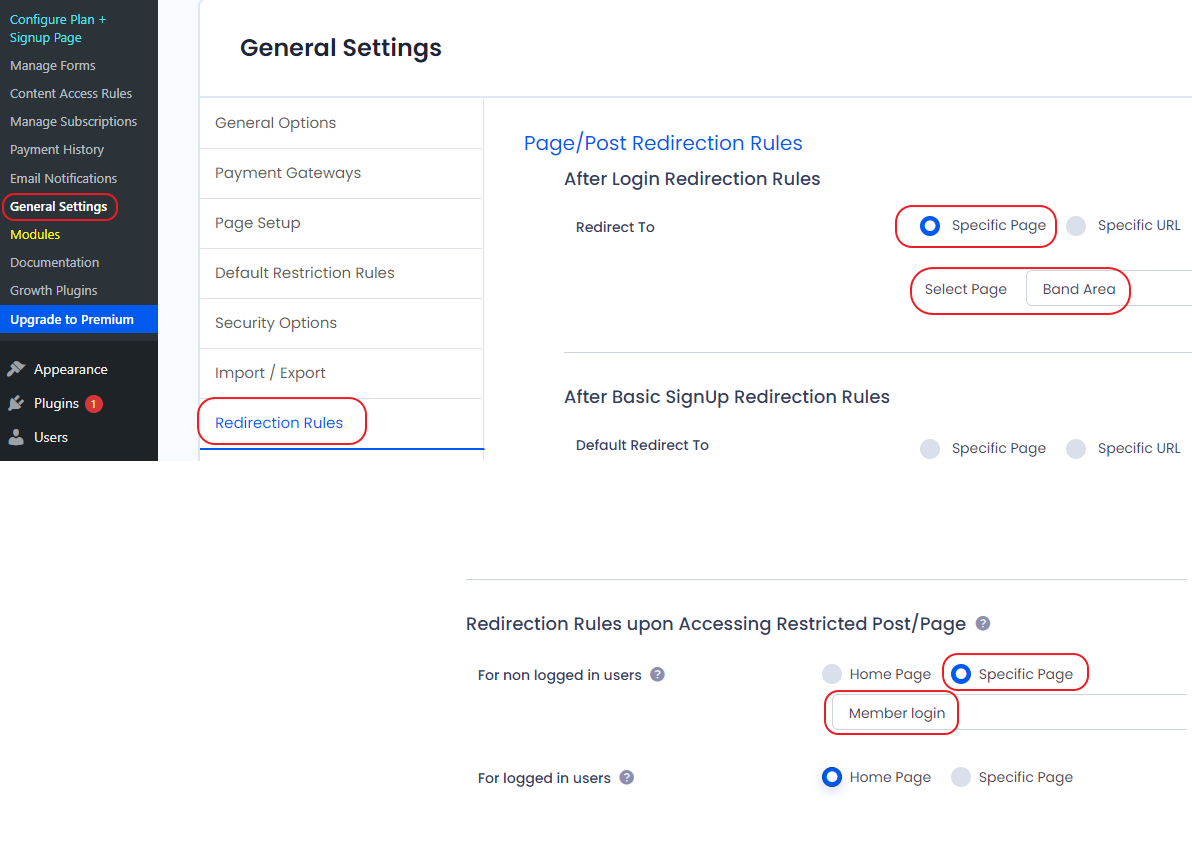
Lastly set the redirection rules to the member login and member area pages. To do this, in the menu on the left, click 'ARMember lite' -> 'General Settings' -> 'Redirection Rules' and set the following 2 rules:
That's it - enjoy!